Here are 9 steps to use PuTTY on Windows
Step 1: Download putty from https://www.putty.org/ as your recommended version like 64-bit or 32-bit
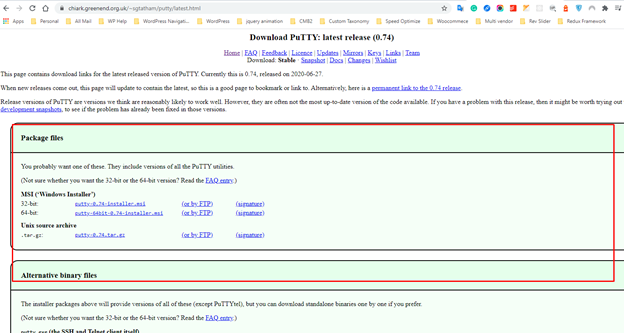
Step 2: Install putty on your computer. The installation process is the same as other software.
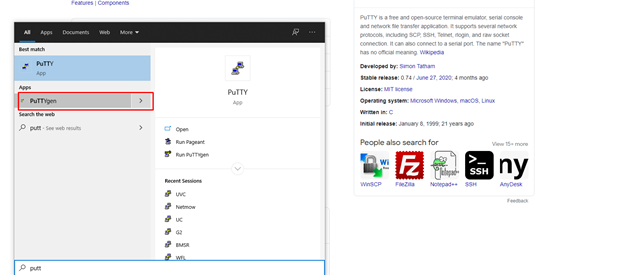
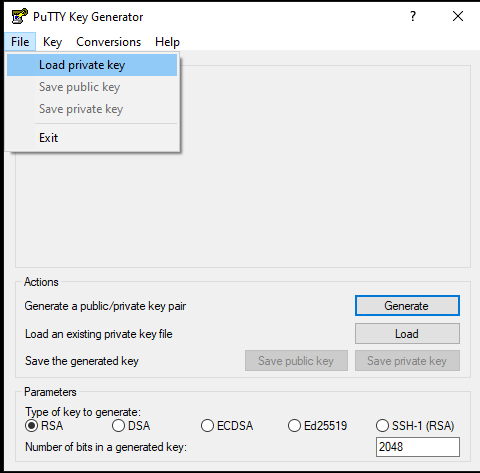
Step 3: After installing open putty open puttyGen from the start menu to create a PPK file from pem.
Step 4: Select pem file from your computer and click on the generate button and after generate save the PPK file.
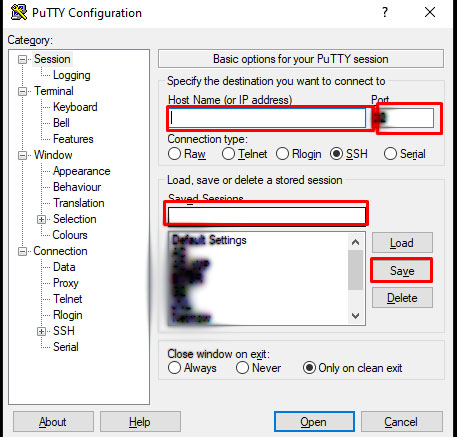
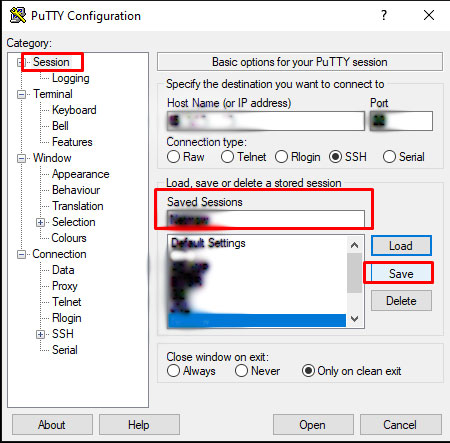
Step 5: Now open putty file and input IP in the Host name, add a post in the port field and name of the project on Saved Sessions and then click the save button.
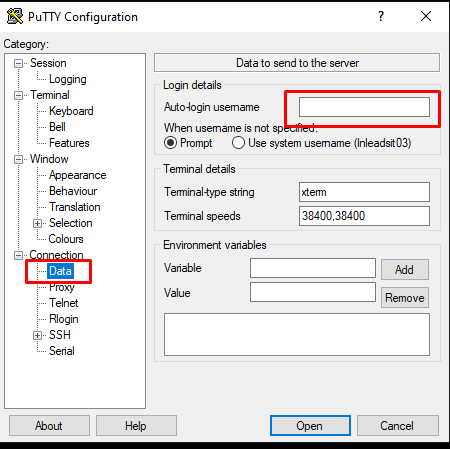
Step 6: Now go to the Data tab under connection and write username in the login details area.
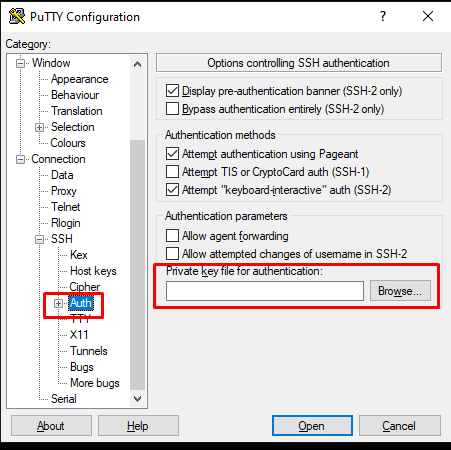
Step 7: Now go to the auth tab under ssh and browse the PPK file from the private key file section.
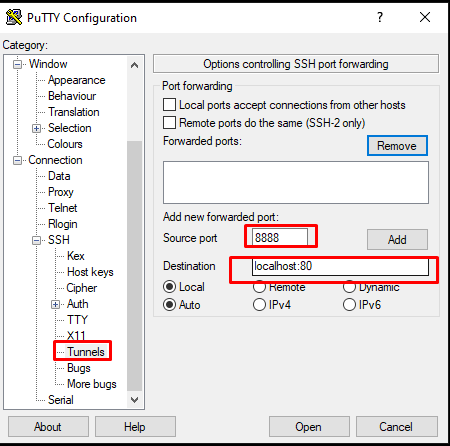
Step 8: Now go to tunnests tab under ssh and write 8888 as source port and localhost:80 as a destination.
Step 9: Now go to the session tab and save again the configuration and open it.
Now you can access phpmyadmin in local using http://127.0.0.1:8888/phpmyadmin/
We hope this article helps you to use the PuTTY on windows.
If you are stuck or anything, you hire us for an expert hand. Book an appointment with us or call at 477937937.
Related Article

How to Use PuTTY on Windows

How to Use FileZilla for file management


